This project has been on my bucket list for a long time. With the recent development of colored E Ink displays like the Spectra E6, I’ve seen more and more people building digital picture frames with them. Since this is an excellent use case for colored E Ink displays, I decided to give it a try myself.
Many projects that I’ve seen were based on the Raspberry Pi. In my view, these displays are only attractive for use cases where long battery life is crucial. If I need to operate a Raspberry Pi that’s constantly connected to a power supply, why should I use an E Ink display in the first place, right? One could argue that E Ink displays look and feel more like real paper. While this is true, we’ll learn later why the technology isn’t quite there yet.
Hardware
The Spectra E6 E Ink Display
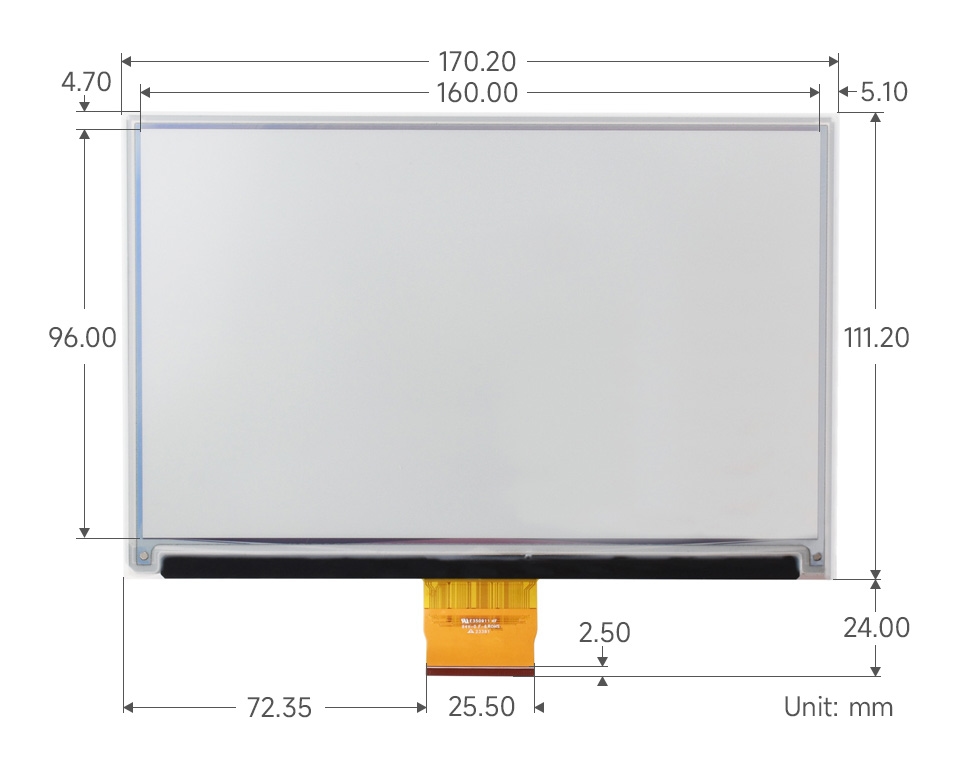
First off, let’s talk about the star of the show: E Ink Spectra™ 6. I got the 7.3" version from Waveshare.
- Six colors: red, green, blue, yellow, black and white.
- Resolution: 800x480
- Image refresh time: ~12s
- Interface: 3-wire SPI or 4-wire SPI - I went with a 4-wire setup.
Most importantly, it requires no power to retain the image, making it an ideal candidate for a digital picture frame.
Operating the Display via ESP32
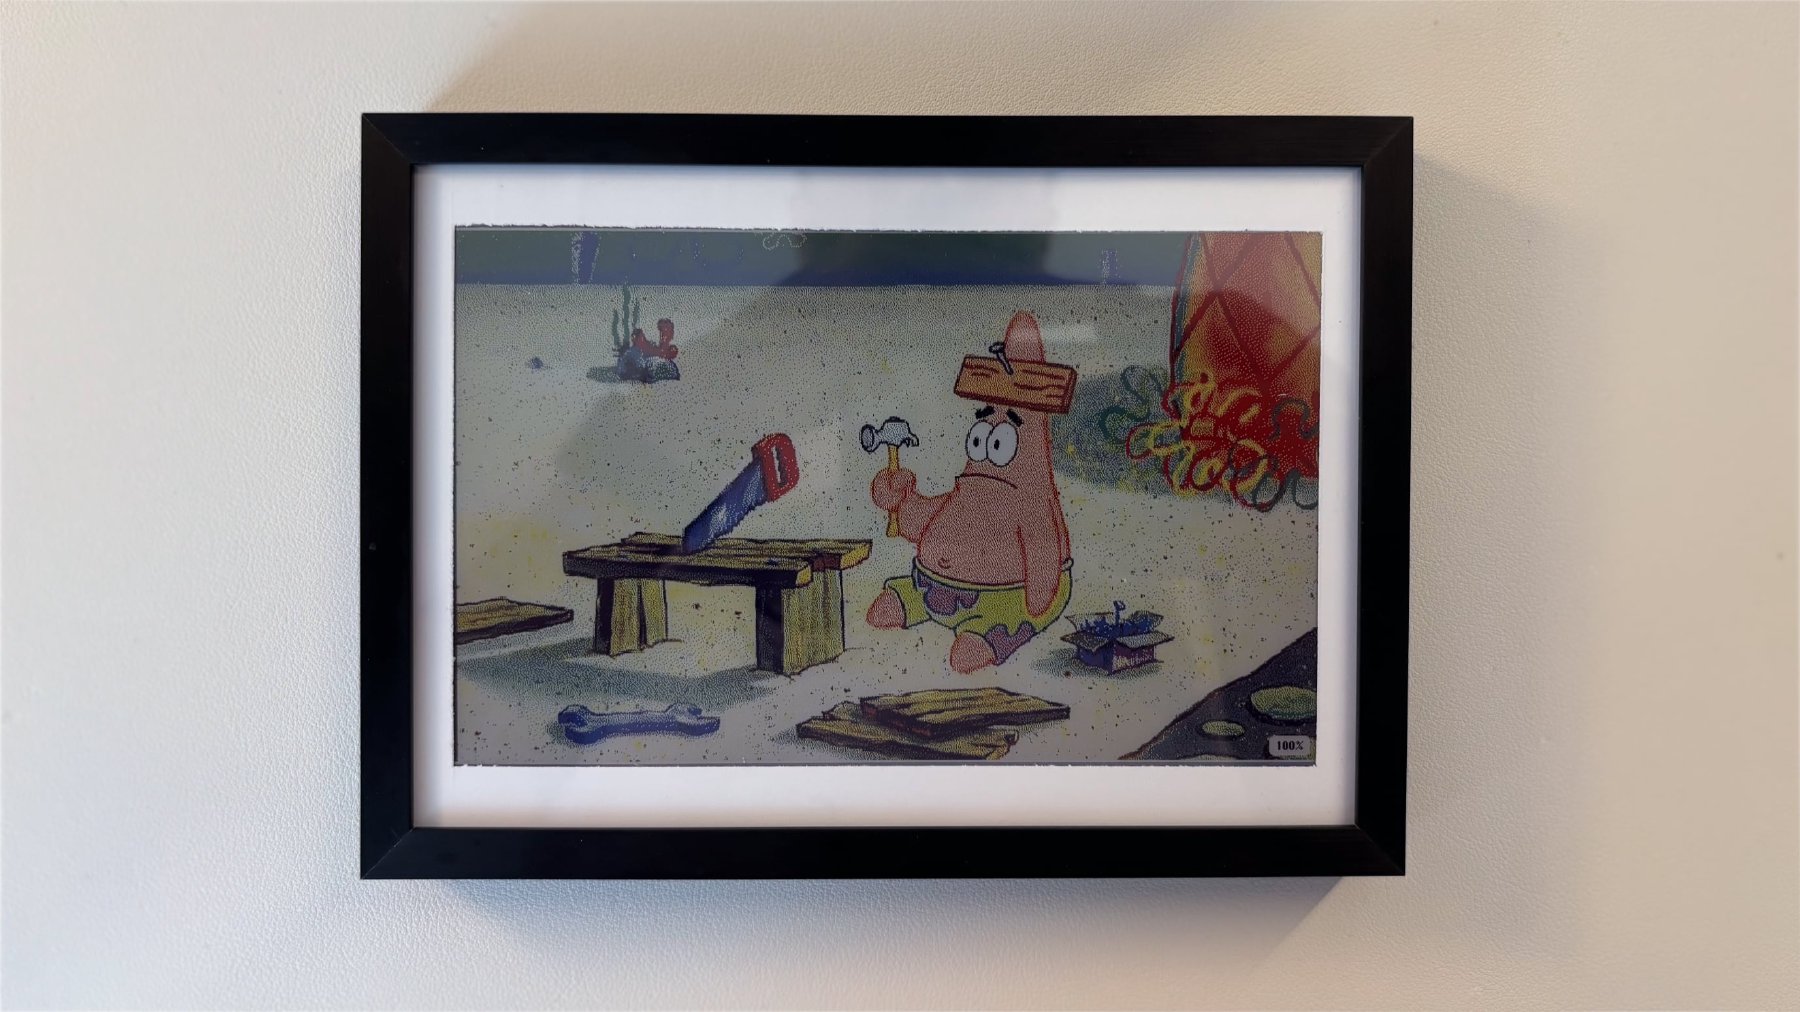
So yeah, I have the display and plenty of ESP32 boards—but how do I actually operate the display? The display comes with an FFC (Flat Flexible Cable) connector that requires a few dozen connections. A more sophisticated approach would be to study the SPI interface, build the necessary hardware, design a custom PCB, and solder everything together with the ESP32 microcontroller. I think this will be a project for the future. For now, I just wanted to focus on getting a prototype working. I might study the electronics further, but right now I’m feeling like Patrick from SpongeBob in the picture above. 😐🔨
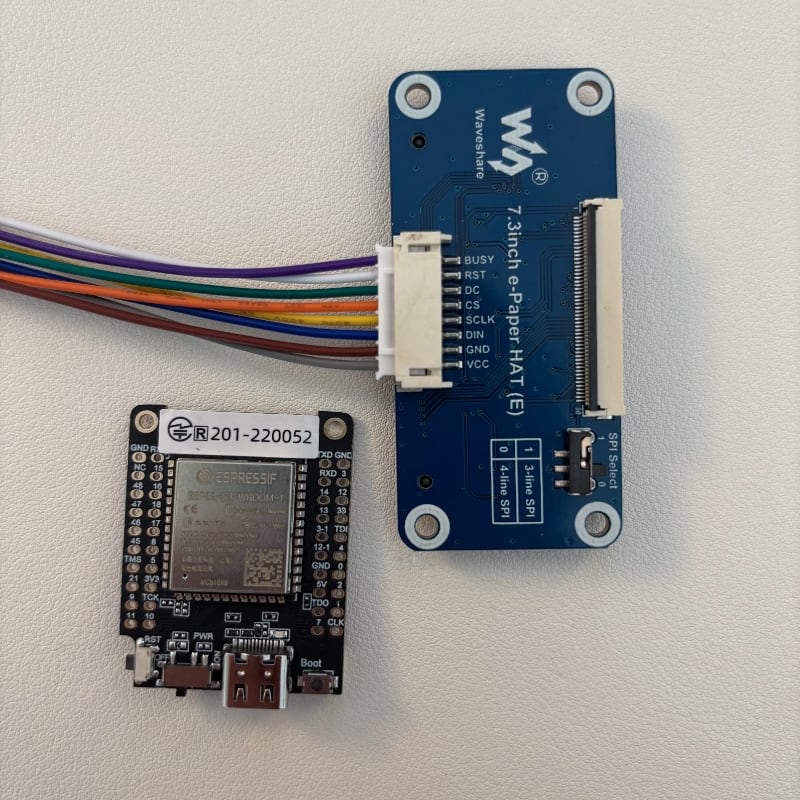
To avoid all of this, I just went with the Waveshare E-Paper Driver HAT. This comes with an JST-PH connector with 8 pins which can be all connected to my ESP32 board.
For the microcontroller, I went with an ESP32C3 Development Board from LilyGo. I chose this mainly because it includes a battery charging circuit, power switch, and a mini JST connector for attaching a LiPo battery. It also comes with 8MB PSRAM, which is more than enough for our use case.
Wiring up & Fitting into Picture Frame
After wiring and soldering everything up, I managed to squeeze it all behind a picture frame held together by… tape.
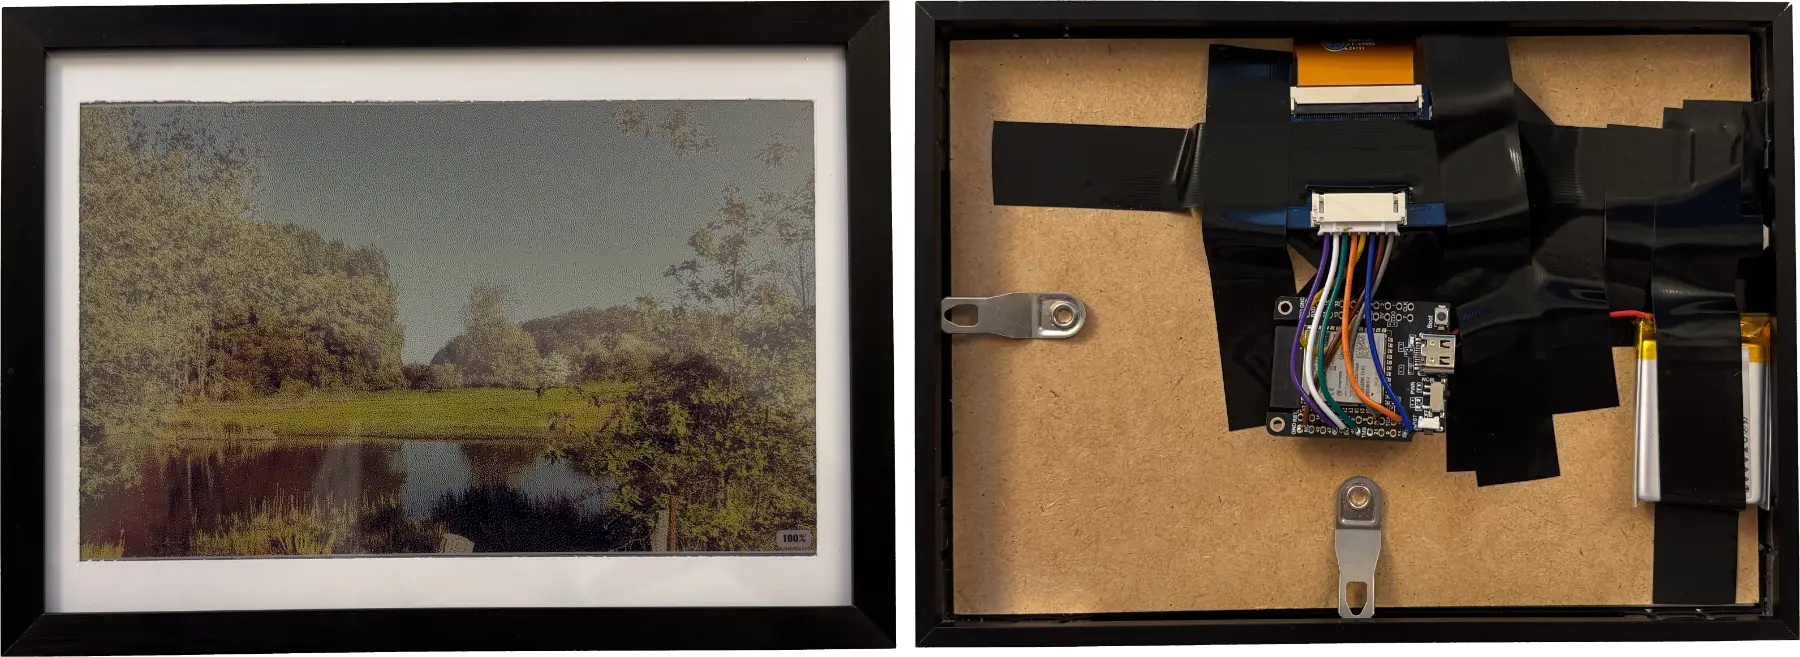
It would probably be better to design a custom PCB that acts as a backplate for the display and 3D print a case for the battery, but for now this works.
Software
Finally, the part I find much easier as a professional software engineer: programming! To complete our digital picture frame, we need the following components:
The ESP32 microcontroller firmware needs to:
- Connect to the WiFi network
- Download an image from the internet
- This means we need a place to upload images and a user interface for uploading them
- Process the image and display it
- Before displaying, we need to prepare the image for the E Ink display by scaling it down and fitting it to the display’s resolution
- Note: The Spectra E6 display supports only 6 colors. To create the illusion of a wider color range and shading, we need to apply dithering
- Go to deep sleep and wake up at fixed intervals to repeat the process
Dithering
I decided to go with the Floyd-Steinberg Dithering algorithm since it seemed to be the most popular choice. After experimenting with different algorithms, I found this produced the best results. A great source of information was the GitHub repositories from the paperlesspaper.de team—kudos!
The question came up whether to implement the image processing directly on the ESP32 firmware or as a dedicated web service. I decided to build a dedicated web service in Go instead of integrating this into the firmware. This turned out to be a good choice because it’s much easier to iterate on a web service and test it in the browser compared to iterating on ESP32 firmware. This also saved me from worrying about the microcontroller’s limited memory capacity.
I won’t go too deep into the details, but here’s how the microcontroller uses the dithering service:
GET /process
  ?url={source-image}
  &width=800
  &height=480
  &dither=true
  &colors=000000,ffffff,e6e600,cc0000,0033cc,00cc00
You pass in the parameters of the desired output image and it takes care of fitting the image inside the resolution of the display, applying Floyd-Steinberg dithering using the provided color palette.
If interested, I can publish the GitHub repository and dedicate a blog post to it.
Image Upload
Finally, we need to upload photos somewhere so the ESP32 can pass them to the source-image query parameter of the
dithering service. To keep things simple in the firmware, I thought it would be sufficient to have a single URL serving
the latest image. Users can overwrite this image at any time by uploading a new photo, but it’s served under the same
URL.
One option would be to create another web service with a user interface for uploading images. This would mean implementing security measures to prevent unauthorized access, or if I wanted to make it public, I’d have to build user authentication, registration, etc. Way too complicated!
Instead, I decided to build a custom Telegram bot. I already have Telegram installed on my phone, so this saved me from building a companion mobile app or web app. It turned out to be very straightforward to use the Telegram Bot API. My Telegram bot assigns a unique SHA256 ID to each user, which serves as the unique URL for their images. This image URL is shared with the user when they first interact with the bot. It retains only the last image sent to it and responds with a 👍 reaction when the image is uploaded successfully.


A nice side effect of this approach is that Telegram already supports basic image editing features when sending images. For some images, it’s helpful to tweak the contrast and saturation before sending.
I also experimented with automatically increasing image contrast in the dithering service, but this didn’t provide consistently better results. While it helps with some types of images, it makes others worse. I guess there are limitations on which image styles render well on the Spectra E6 and which don’t.
Outcome
Overall, this was a fun project and I learned a few new things along the way. However, I expected more from the Spectra E6 display:
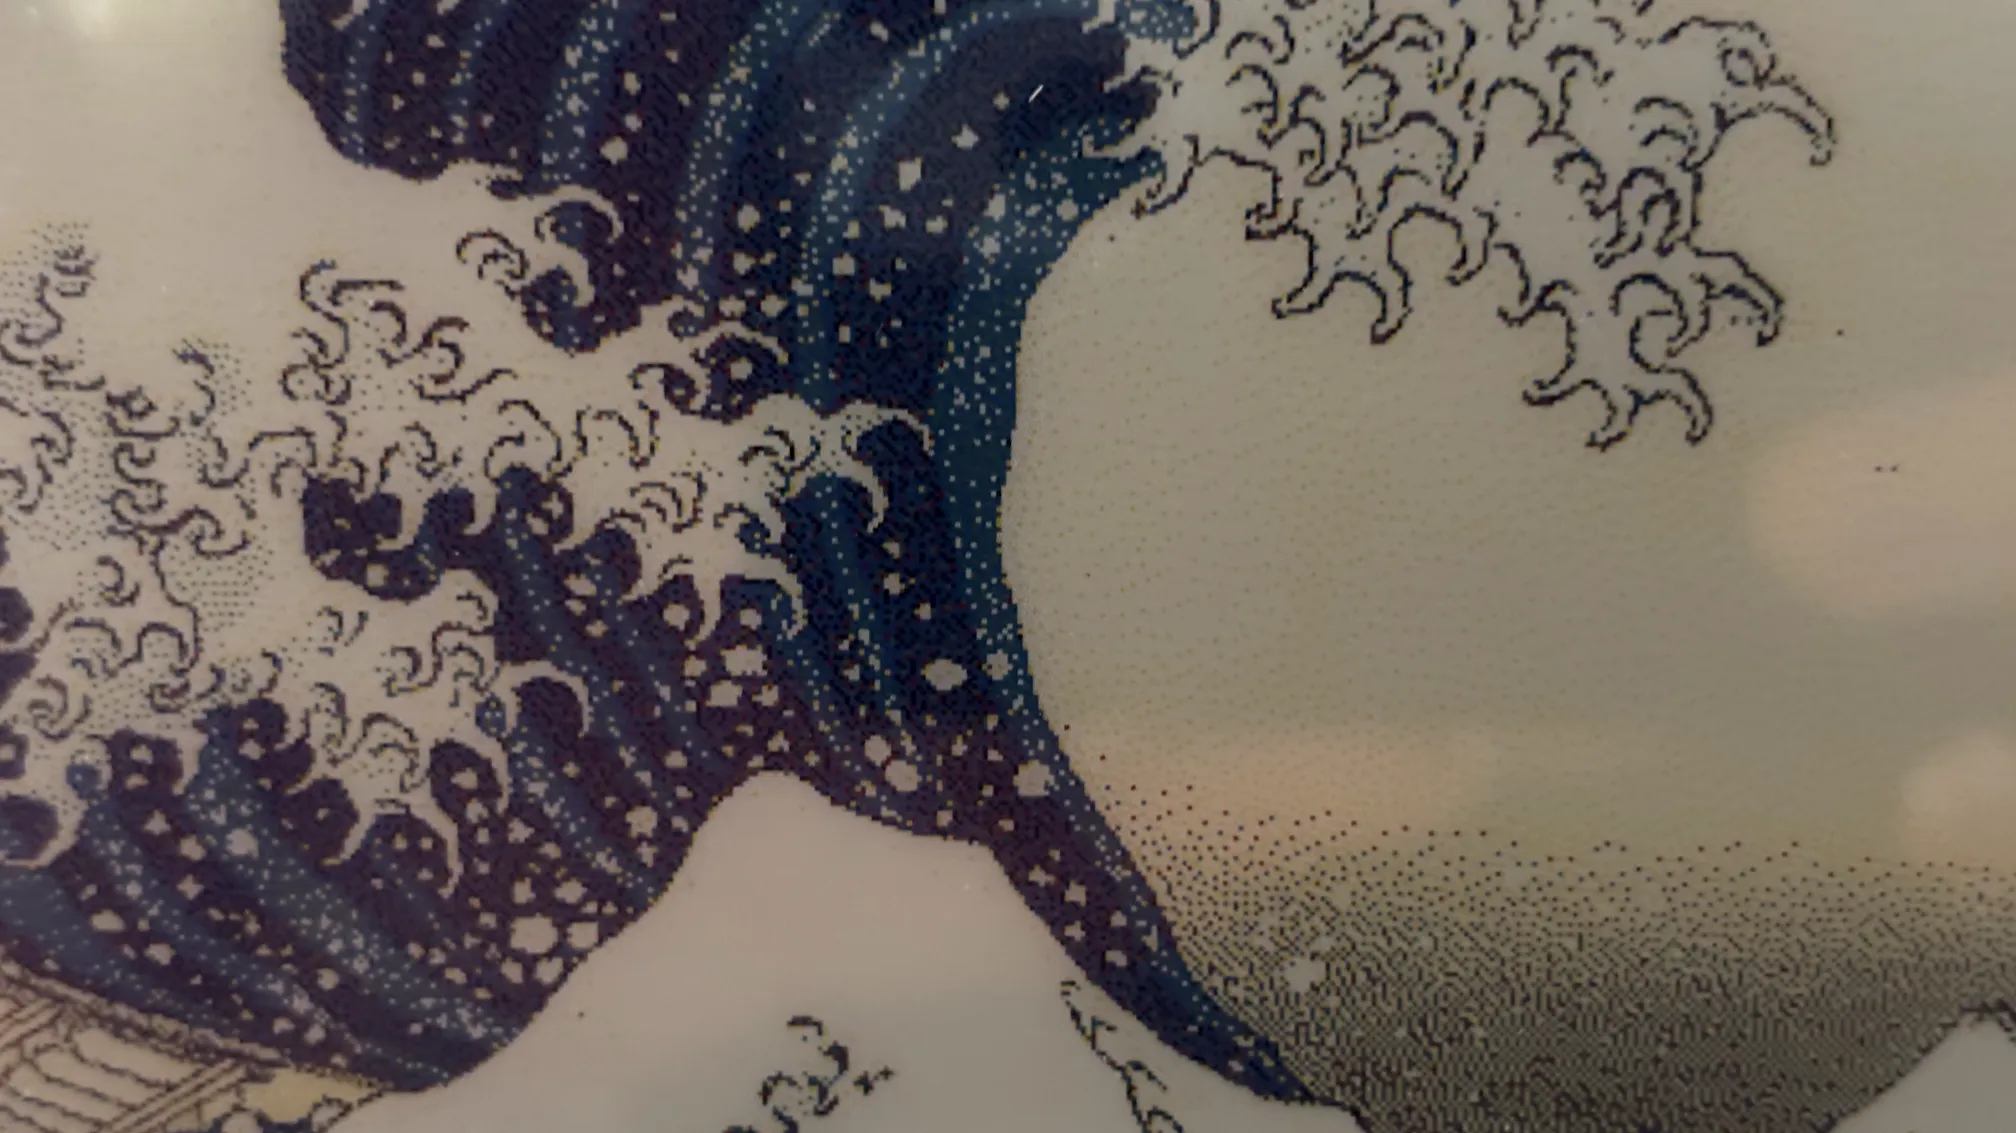
- The resolution might sound fine on its own, but since we rely heavily on dithering to widen the perceived color spectrum, the effective resolution can be much lower
- The display colors are quite dull and dark. The white color especially isn’t really white but rather gray, which decreases image contrast, especially when placed next to printed pictures
- When placing everything inside a picture frame, the glass cover makes things worse due to reflections. Using matte glass might be a better option
- These displays look best when viewed from at least 1-2 meters distance, which means you need the larger displays that are significantly more expensive
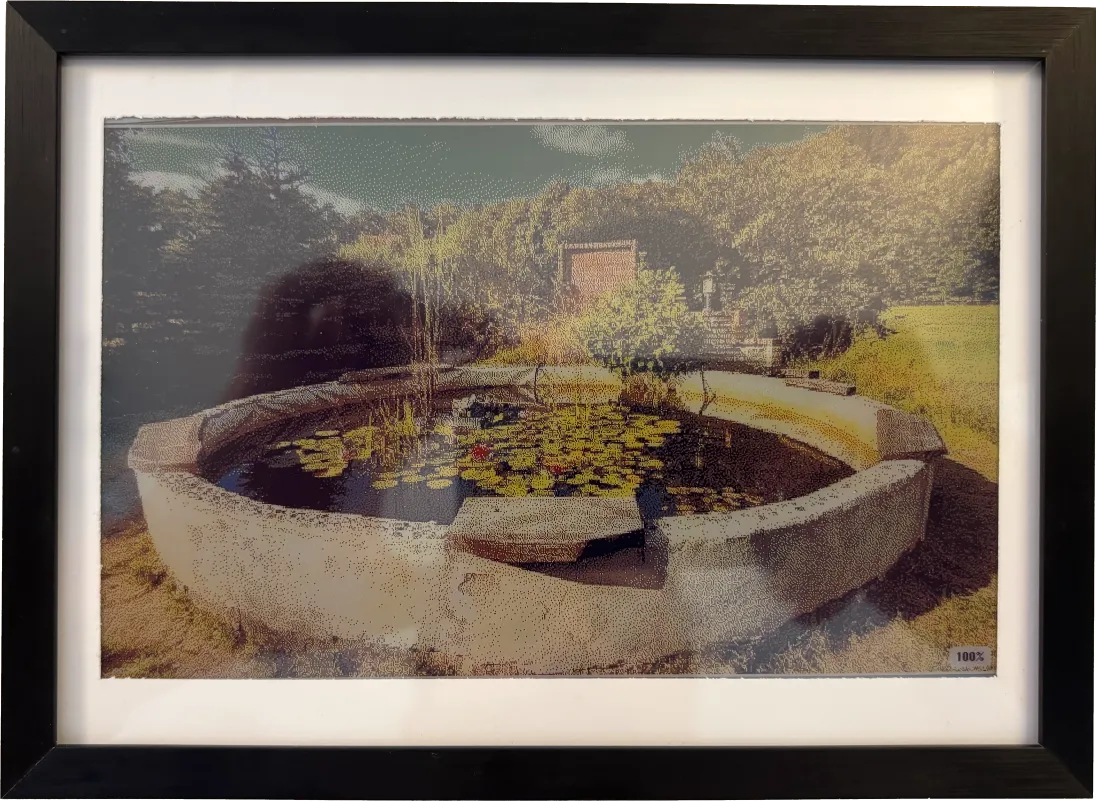
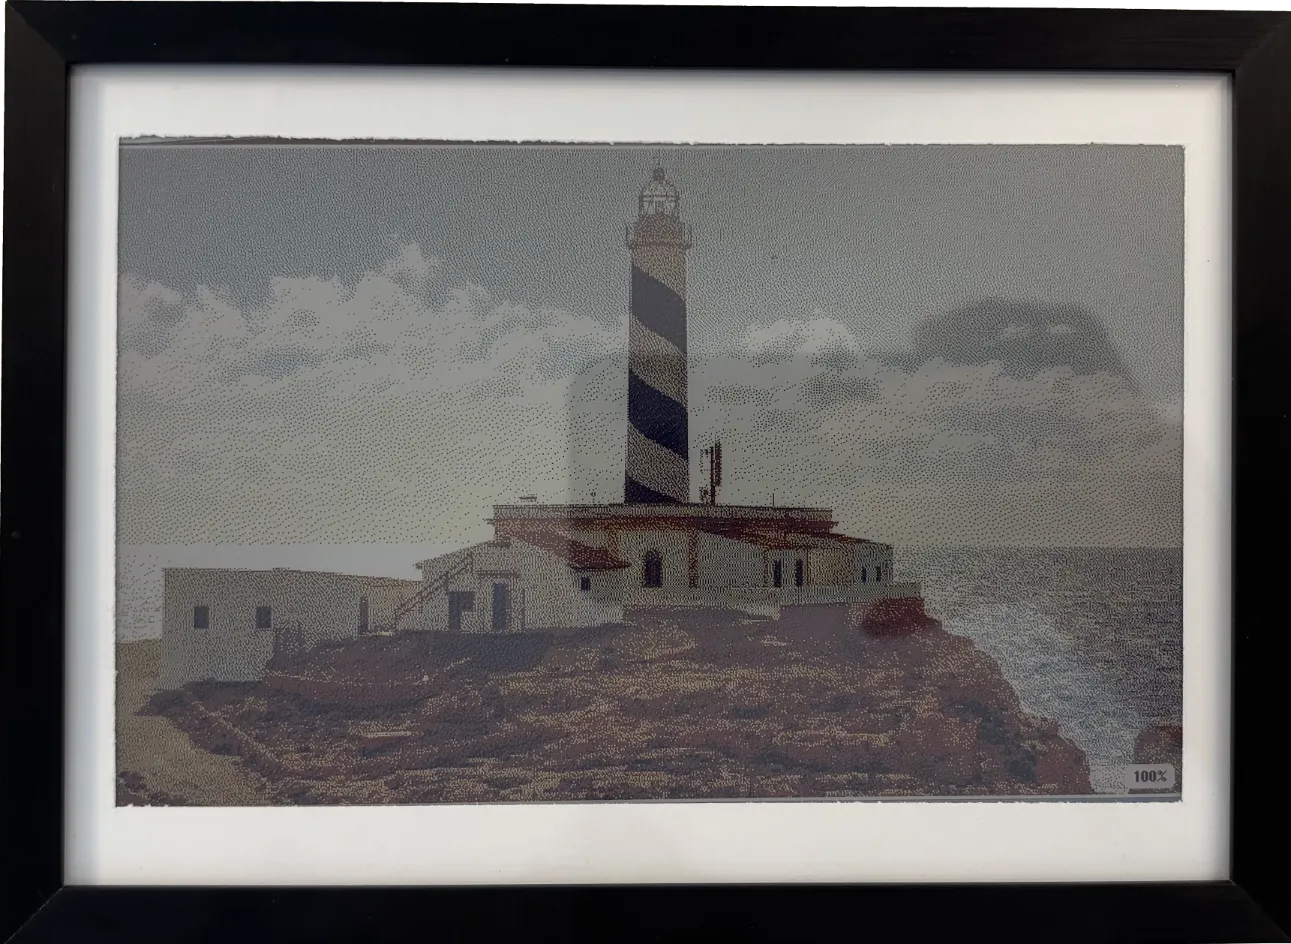
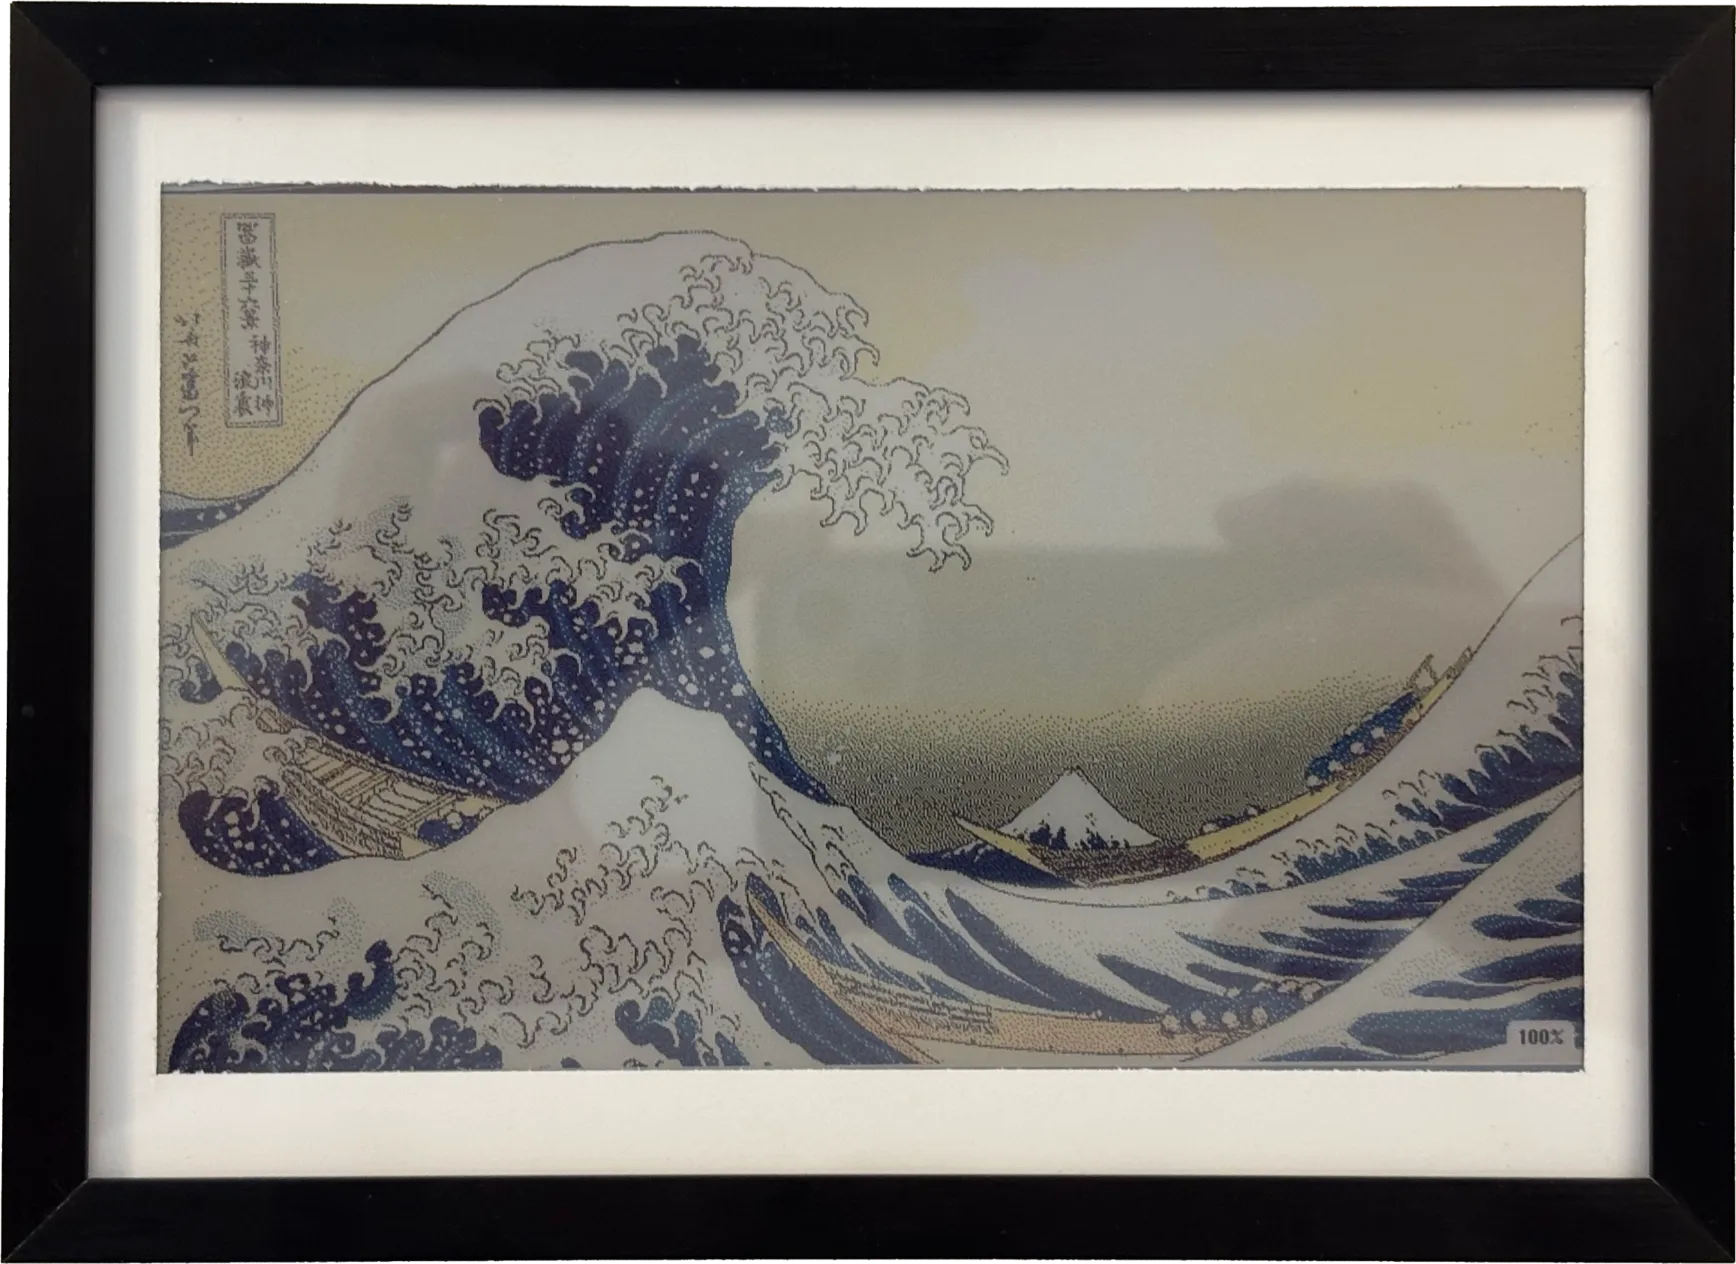 In my experience, comic-style pictures without many colors look quite good. Photos of nature are
rather… meh. Close-up portraits can also look good, but it’s a gamble depending on lighting, contrast, etc.
In my experience, comic-style pictures without many colors look quite good. Photos of nature are
rather… meh. Close-up portraits can also look good, but it’s a gamble depending on lighting, contrast, etc.
That’s it for now—thank you for making it this far! I might iterate on this project in the future. There are plenty of options to explore to make this better, especially on the hardware side.
Source Code
Let me know if you have any questions: blog@shvn.dev ✌️